

Case Study

Improve Design for Manufacturability (DFM)

10 Reasons Why Industrial Design and Mechanical Engineering Must Work Together

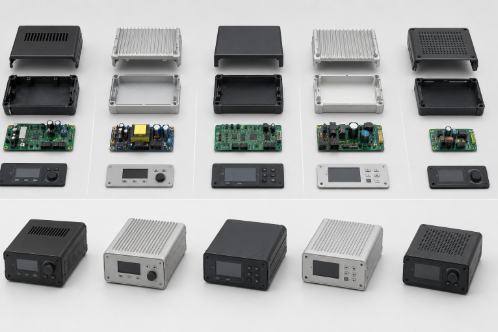
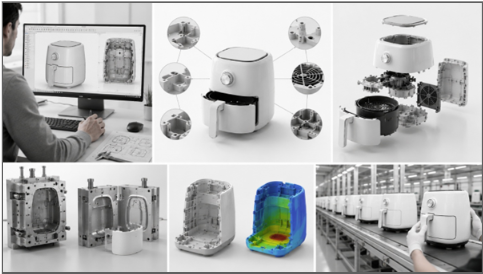
Most product failures do not happen on the factory floor. They happen months earlier, when industrial design and mechanical engineering work in separate lanes instead of one shared process. A product can look stunning on screen and still fail in production if structural feasibility, tooling limitations, assembly logic, and manufacturing constraints are not considered from day one. When industrial designers and mechanical engineers collaborate early, businesses reduce costly redesigns, shorten development timelines, improve Design for Manufacturability (DFM), and launch products that are both visually appealing and mechanically sound. This is especially important for startups and growing manufacturers, where every prototype cycle and tooling decision carries real financial weight. A single overlooked clearance issue, tolerance stack-up, or unrealistic mold geometry can add weeks to a launch schedule and significantly increase development costs. Building a shared workflow between industrial design and mechanical engineering from the earliest sketches helps protect product quality, manufacturing efficiency, and the bottom line. The following ten reasons explain why this collaboration is essential for successful product development. Key Benefits of Integrating Industrial Design and Mechanical Engineering Before diving into the details, here is a quick snapshot of what cross-functional collaboration delivers. It reduces costly design revisions during development, improves Design for Manufacturability (DFM), and Design for Assembly (DfA), and lowers injection mold tooling costs. It also simplifies product assembly, accelerates prototype validation, and improves component packaging, and enhances product reliability and durability. Beyond the production line, it reduces manufacturing risks, speeds up product launches, improves product quality and user experience, and supports scalable production as a business grows.  Industrial Design Mechanical Engineering Combined Business Benefit Product aesthetics Structural integrity Better product quality User experience Manufacturability (DFM) Lower production costs Ergonomics Material selection Improved reliability Product form Assembly optimization (DfA) Faster product launches Brand identity Thermal & structural performance Production-ready products 1. Prevent Costly Product Redesigns Later in Development When industrial designers and mechanical engineers review a product concept together during the early stages of development, they can identify packaging constraints, structural feasibility, manufacturability, and assembly issues before a single prototype is built. This proactive approach helps reduce engineering change orders (ECOs), avoid costly redesigns after prototyping, and keep project timelines and development budgets on track.  According to engineering cost studies, the cost of implementing design changes increases significantly as projects progress from concept design to tooling and production. Identifying design issues early helps minimize engineering changes, reduce development costs, and prevent schedule delays later in the product development process. Redesigns rarely stay contained to a single part. A change to a wall thickness can ripple into the mold, the assembly fixture, and the supplier quote, multiplying both cost and delay. Catching these conflicts at the concept stage, while changes are still just sketches and CAD files, is dramatically cheaper than catching them after a tool has already been cut. Many costly redesigns can be prevented through a structured design review process that identifies manufacturability, assembly, and production risks before development progresses. Learn more about the  design review mistakes that lead to costly production delays. Engineering Scenario: Consumer Kitchen Appliance During the development of a consumer kitchen appliance, the industrial design team proposed a sleek, compact enclosure to enhance the product’s visual appeal. During the concept phase, mechanical engineers identified potential packaging constraints between the heating assembly, airflow components, and electronic controls that could have led to multiple redesigns during prototyping. By working together early, both teams optimized the internal layout, refined the enclosure design, and ensured sufficient space for critical components without compromising the product’s aesthetics. Addressing these challenges before prototype development reduced engineering changes later in the project and helped prepare the design for efficient manufacturing. 2. Balance Product Aesthetics with Engineering Performance A great-looking product still has to function reliably. Collaboration ensures attractive designs meet structural requirements and that ergonomics are optimized without compromising functionality. Teams can address thermal, mechanical, and environmental constraints early, which improves user experience while maintaining reliability and prevents conflicts between styling goals and engineering requirements.  Tension between aesthetics and engineering is one of the most common sources of friction in product development. A designer may want thin, seamless surfaces, while an engineer needs enough wall thickness to survive a drop test. Resolving that tension together, rather than passing a finished concept down the chain, usually produces a design that satisfies both goals instead of forcing one team to compromise late in the process. Engineering Scenario: Premium Coffee Machine While designing a premium coffee machine, the industrial design team proposed a seamless front panel with hidden fasteners to achieve a clean, modern appearance. During engineering development, the mechanical team identified that the original design restricted airflow around the heating system and made routine servicing difficult. Working together, both teams refined the internal structure by redesigning mounting features, improving ventilation paths, and integrating hidden fastening solutions that maintained the product’s premium appearance. The final design achieved the desired visual appeal while meeting structural, thermal, and serviceability requirements without compromising manufacturing feasibility. 3. Optimize Internal Component Packaging Maximizing available internal space allows for efficient placement of batteries, PCBs, connectors, and mechanical components, reducing interference between parts. This simplifies assembly and servicing while supporting compact, user-friendly product designs without compromising functionality. Internal packaging decisions made early often determine how much flexibility a product has for future revisions. A layout designed with adequate clearances and modular component placement makes it easier to upgrade batteries, integrate additional electronics, improve airflow, or accommodate regulatory changes without redesigning the entire enclosure. Engineering Scenario: Consumer Kitchen Appliance s a consumer kitchen appliance evolved to include additional electronic features, the available space inside the enclosure became increasingly limited. The challenge was to accommodate the heating assembly, control PCB, airflow system, wiring, and removable basket within a compact product without increasing its external dimensions. By carefully reorganizing the internal component layout, optimizing mounting features, and improving cable routing, the engineering team created a more efficient package that simplified assembly and improved serviceability. The optimized layout also provided flexibility for future product

10 Reasons Why Industrial Design and Mechanical Engineering Must Work Together Read More »
Overengineering Structural Features

10 Design Mistakes That Increase Injection Mold Tooling Costs and How to Avoid Them

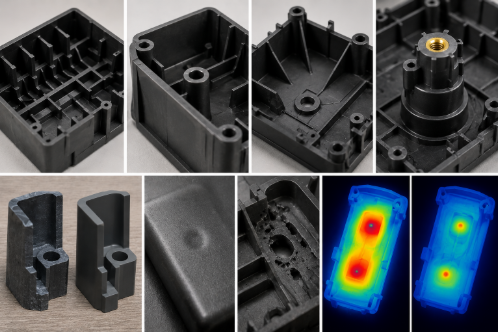
Tooling is one of the largest upfront investments in any injection-molded product. For most projects, the mould itself represents 30 to 60 percent of total product development cost, and those numbers can climb fast when the design is not built with manufacturability in mind. The frustrating reality is that most tooling cost overruns are not caused by poor supplier selection or unexpected material prices. They are locked in during the design phase, often weeks or months before a purchase order is issued. This guide walks through ten design decisions that consistently drive up injection mold tooling costs, along with practical strategies engineers and product teams can use to avoid them. Each section includes a real-world case study to show how the principles apply in practice. 1. Designing Features That Require Side Actions, Sliders, and Lifters What Are Side Actions, Sliders, and Lifters? Side actions in injection molding are mechanical mechanisms built into a mold to form features that cannot be released by opening the mold along its primary axis. Sliders move horizontally to create external undercuts such as lateral holes or recesses, while lifters in injection molds move at an angle to release internal undercut features during part ejection. Both add significant mechanical complexity to the tool. How Undercuts Drive Up Mold Complexity and Cost Every undercut design feature in a design requires a corresponding mechanism in the mold. Each mechanism adds machined components, wear surfaces, cooling considerations, and assembly points. A simple two-plate mold with no side actions can be designed, machined, and assembled in a fraction of the time a mold with four or five mechanisms requires. Beyond initial build cost, mechanisms increase long-term maintenance frequency and the likelihood of production downtime. The cost impact of mold complexity caused by side actions is significant. Industry estimates suggest each additional side action can add 8 to 15 percent to total tooling cost depending on the mechanism size and accessibility within the tool. For a baseline mold in the $40,000 to $80,000 range, three or four side actions can translate to an additional $15,000 to $30,000 in tooling investment before production begins. Design Alternatives and DFM Strategies The most effective way to control mold construction cost is to eliminate undercuts during the design phase through geometry modification. Repositioning holes to align with the draw direction, splitting features across two mold halves, or adding draft to recessed areas can often remove the need for mechanisms entirely. When side actions are unavoidable because functional requirements demand the feature, toolmakers should be consulted early to select the lowest-complexity mechanism that satisfies the design intent. DFM reviews that focus specifically on injection mold tooling costs will flag every potential side action before mold design begins, giving engineering teams the option to simplify while design changes are still inexpensive.   Case Study: Smart Home Controller EnclosureA smart home device manufacturer designed a plastic enclosure with multiple side openings for cable routing and mounting features. The initial design required four side actions and two lifters, significantly increasing mold complexity and tooling costs. During a DFM review, the enclosure geometry was modified to avoid many undercuts and reposition critical features. The revised design reduced the number of side actions required, simplified mold construction, and shortened tooling lead times. The company moved into production faster while avoiding unnecessary tooling investment.   2. Creating Intricate Geometries That Increase Mold Complexity What Makes a Geometry Difficult to Mold? Not all complex shapes present the same challenges. The geometries that consistently drive up machining time and tooling cost share a few common characteristics: deep, narrow ribs that are difficult to reach with standard cutters, sharp inside corners that require EDM rather than CNC machining, organic contours that require extensive hand polishing, and sections where wall thickness varies dramatically across a single surface. Deep ribs below a width-to-depth ratio of 1:3 create significant access limitations for milling tools. Cutting these features typically requires small-diameter end mills running at slow feed rates with multiple passes, or EDM operations that add days to the machining schedule. Either way, the cost per feature rises sharply compared to a part with open, accessible geometry. Impact on Cycle Time and Production Cost Intricate geometries do not just increase tooling cost during fabrication. They affect cycle time in production as well. Thin walls in isolated areas of an otherwise thick part create uneven cooling, forcing longer cycle times or introducing warping and sink marks that require secondary processing. Every second added to the production cycle multiplies across hundreds of thousands of parts over a tool’s lifetime. Simplification Strategies During Product Development The best time to challenge geometric complexity is during early concept review, before industrial design decisions are locked. Replacing organic transitions with compound radii, reducing rib depth, and standardising fillet sizes across a part are changes that take minutes to implement in CAD but can remove hours of machining time from the tooling schedule. Balancing aesthetics with manufacturability is not a compromise; it is a design discipline that produces better products at lower cost.   Case Study: Wearable Electronics HousingA wearable electronics company requested a premium cosmetic finish across all exterior and interior molded surfaces. Toolmakers identified that the specification would require extensive polishing and significantly increase mold fabrication time. After reviewing the product’s user interaction points, the design team limited premium finishes to visible exterior surfaces only. Interior and mating surfaces were assigned practical functional grades. This reduced mold finishing requirements while maintaining product aesthetics where it mattered most.   3. Over-Specifying Cosmetic Surface Finish Requirements Understanding SPI Surface Finish Standards The Society of the Plastics Industry defines a graded scale of mold surface finish cost standards, from the rough A-6 through the mirror-polished A-1. Each step up the scale requires progressively more hand polishing time, higher-grade polishing media, and greater skill from the toolmaker. The difference in labour between an SPI B-2 finish and an SPI A-1 finish on a large mold face can represent 40 to 80 hours of additional skilled polishing work.

10 Design Mistakes That Increase Injection Mold Tooling Costs and How to Avoid Them Read More »

Modular Product Architecture for Faster Manufacturing

10 Product Design Decisions That Reduce Assembly Time and Manufacturing Costs

In today’s competitive manufacturing landscape, the most successful products are not just well-engineered; they are designed to be built efficiently. Product design decisions made during the early development phase have a direct and measurable impact on assembly time, production costs, tooling complexity, and overall profitability. At Engon Technologies, we help hardware manufacturers and product teams build smarter from the start. Here are ten high-impact design decisions that reduce assembly time and manufacturing costs without compromising product performance.   1. Reduce Part Count Through Functional Integration Why Fewer Components Mean Lower Manufacturing Costs Reducing part count is one of the most powerful levers in Design for Assembly (DfA). Every additional component in a Bill of Materials (BOM) adds procurement complexity, storage requirements, assembly labor, and the risk of defects. Functional integration, which combines two or more parts into a single moulded or machined component, eliminates redundancy while maintaining full performance. When should multiple parts be combined into one? The decision depends on whether the functions served can be physically co-located without sacrificing structural integrity, repairability, or material compatibility. If a bracket, a housing, and a locating feature can all be captured in a single injection-moulded part, the design is almost always stronger and cheaper in production. The practical impact of reducing part count is significant across several cost centres: BOM reduction lowers material and procurement costs; tooling consolidation reduces the number of mould tools required; inventory simplification cuts warehouse and logistics overhead; and assembly labour savings compound with every unit produced. In consumer electronics and industrial equipment, this principle consistently delivers 15 to 30 percent reductions in per-unit assembly time. AI Overview Opportunity: “How reducing part count lowers manufacturing cost” Case Study: Industrial Equipment Assembly An industrial equipment manufacturer redesigned a multi-part mounting assembly by integrating brackets and locating features into a single moulded component. The change reduced part count by 28%, shortened assembly time, and lowered inventory management costs while maintaining product performance. 2. Design Self-Locating Features That Eliminate Manual Alignment How Engineers Reduce Assembly Errors with Smart Geometry Manual alignment is one of the most time-consuming and error-prone steps in assembly. Self-locating features, geometric details built directly into parts, guide components into their correct position automatically, reducing operator intervention and dramatically cutting the opportunity for defects. Common self-locating features include: Alignment tabs: protrusions that slot into corresponding recesses, locking parts into position before fastening Lead-ins: tapered edges that guide mating surfaces together smoothly during assembly Chamfers: angled edges that ease part insertion, reduce force requirements, and prevent mis-seating Guide pins: precision locating features that align sub-assemblies within tight tolerances Assembly poka-yoke principles: asymmetric geometry that physically prevents incorrect part orientation (see Section 9) When self-locating features are properly engineered, they reduce assembly time, eliminate rework, improve consistency across production runs, and reduce the training burden for assembly operators. The investment in slightly more complex tooling geometry pays back rapidly at scale.   AI Overview Opportunity: “What are self-locating features in product design?”   3. Replace Excessive Fasteners with Snap-Fits and Integrated Joining Features Reducing Assembly Time Through Fastener Optimization Screws, bolts, and threaded inserts are reliable, but they are also slow, expensive, and tool-dependent. Every fastener in an assembly requires a separate component, a separate assembly step, a torque specification, and often a dedicated tool. Fastener reduction strategies replace screw-based joining with engineered alternatives that are faster to assemble and cheaper to produce. Snap-fit features (cantilever, annular, or torsional) can replace multiple screws in a single housing or cover assembly. When properly designed with correct deflection limits and material selection, snap-fits provide sufficient retention force for most non-structural applications. Tool-less assembly enabled by snap-fits also simplifies maintenance and end-of-life disassembly. The tradeoffs are real: snap-fits require careful material selection (particularly for fatigue life), tighter geometric tolerances on mating features, and a higher tooling investment upfront. For high-volume consumer products, the per-unit savings in hardware procurement and assembly time typically justify this investment within the first production run. This is also an area where industrial design and mechanical engineering collaboration matters most. Industrial designers define the user experience of product opening and closing; mechanical engineers validate the structural requirements. When these disciplines work together during DfA review, the result is a joining strategy that is both functional and manufacturable.   Case Study: Consumer Electronics Housing A consumer electronics company replaced multiple screws with engineered snap-fit features in a device enclosure. The redesign reduced assembly operations, shortened production time, and lowered hardware procurement costs without affecting structural integrity.   4. Standardize Components Across the Product Assembly Why Standard Parts Lower Production Costs Non-standard components (fasteners, connectors, brackets, or purchased assemblies) introduce unnecessary complexity into the supply chain and the assembly line. Component standardization is the practice of selecting common, off-the-shelf parts and using the same specification across multiple locations within a product and across the product family. Standard screw sizes mean a single tool torques every fastener on the assembly. Common hardware selection means a single purchase order and a single supplier relationship covers dozens of applications. Purchased component standardization reduces the number of unique line items in procurement, simplifies incoming inspection, and reduces the risk of obsolescence. At the product architecture level, standardization also improves assembly quality by reducing operator decisions. When every M3 screw looks the same, there is no risk of selecting the wrong fastener. Supply chain simplification translates directly into reduced lead times, lower minimum order quantities, and stronger negotiating positions with suppliers.   AI Overview Opportunity: “Benefits of standardization in manufacturing”   5. Design for Top-Down Assembly and Automated Production Simplifying Assembly Line Operations Through Product Architecture Assembly architecture, which refers to the sequence and direction in which components come together, is a fundamental driver of assembly line efficiency. Products designed for top-down assembly exploit gravity, reduce the need for repositioning, and allow components to nest naturally into sub-assemblies. This single principle can reduce fixturing requirements, shorten cycle times, and improve consistency. Key design strategies for top-down assembly include: Gravity-assisted assembly: components seat naturally without

10 Product Design Decisions That Reduce Assembly Time and Manufacturing Costs Read More »

7 DFM Engineering Techniques to Reduce IoT Enclosure Manufacturing Costs Before Production

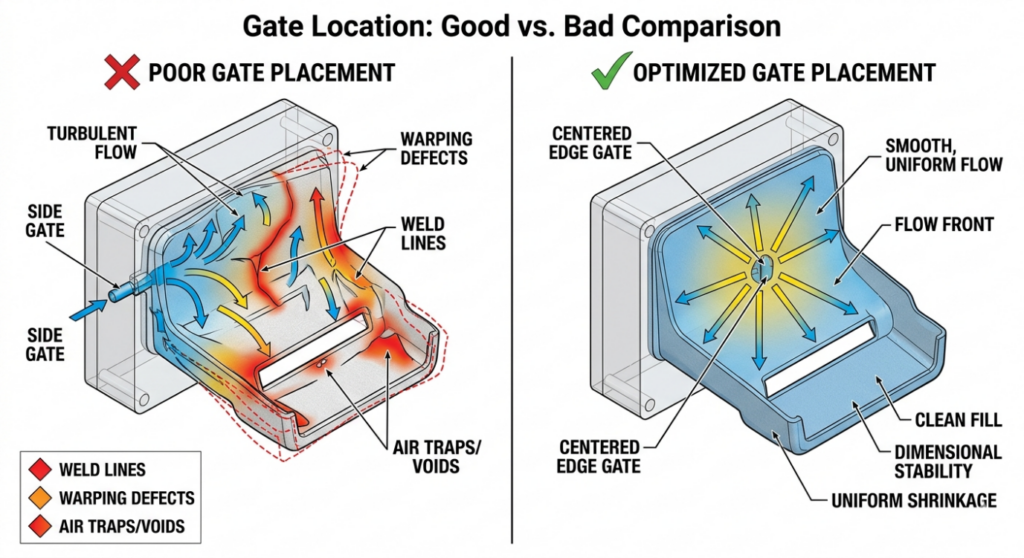
Most hardware startups realize the importance of DFM for injection molding only at advanced stages of tooling. At that stage, even minor modifications require expensive tool rework, causing delays and significant cost overruns. DFM is not a checklist to run through at the end of your design process. It is a discipline that must shape every decision from the earliest concept stages. Applied correctly, it reduces manufacturing costs, improves yield, shortens cycle times, and makes your product far easier to scale when the time comes. This is why many global teams now rely on mechanical product engineering for startups in the US and Europe to ensure DFM is embedded right from the concept stage. This article covers 7 proven techniques for injection molding cost reduction, that directly impact manufacturing costs for IoT enclosures with real case studies that show exactly what poor decisions look like in practice, and what thoughtful design can save. 1. DFM for Injection Molding: Costly Gate Design Mistakes How to optimize gate location in injection molding to avoid costly defects In injection moulding, the gate is the entry point through which molten plastic flows into the mould cavity. A well-planned injection molding gate design determines almost everything about how your part fills, where weld lines form, and whether the finished part warps or remains dimensionally stable. There are several gate types to consider: edge gates are simple and low-cost but can leave visible marks; pin gates offer cleaner aesthetics but require more complex tooling; hot runner systems eliminate gate vestiges entirely but carry significantly higher upfront tooling costs. The right choice depends on your part geometry, production volume, and cosmetic requirements, especially when targeting injection molding cost reduction without compromising quality. Flow balance is the critical concept. When plastic enters from an optimally positioned gate, it fills the cavity evenly, pushing air out through vents uniformly, and cooling with consistent shrinkage across the part. Poor gate placement creates race tracking where plastic flows faster through thicker sections and meets itself at weld lines. These weld lines are structural weak points and often cosmetically visible. Using mold flow analysis, engineers can simulate and validate gate positions before committing to tooling. This is not an expensive luxury; it is one of the most cost-effective investments in the entire product development process.     Case Study: Consumer Electronics Startup, United States Problem: Incorrect gate placement caused uneven material flow, leading to high rejection rates and visible warping in the finished enclosures. Impact: Significant scrap costs are accumulating with every production run. Assembly delays and quality control failures. Fix: Flow simulation used to identify optimal gate repositioning. Tooling was modified before high-volume production commenced. Result: Defect rate was eliminated. Approximately $20,000 saved in scrap and rework costs. Key Insight: Flow balance directly determines your cost per accepted part.   02.Parting Line Design Mistakes That Drive Up Tooling Cost How parting line design affects tooling cost in plastic parts The parting line is where the two halves of your injection mould meet. Effective parting line design in injection molding is one of the most consequential design decisions in plastic part development and one that is frequently underestimated by startups unfamiliar with tooling economics. In DFM for injection molding, parting line strategy plays a critical role in controlling tooling complexity and overall cost.Every time your part geometry forces the mould to split in a complex direction, or requires side actions and lifters to release undercuts, your mold design complexity cost increases These mechanisms drive up cost, add machining time, increase mould maintenance requirements, and introduce additional failure points in production. Simpler parting geometry equals cheaper, more reliable tooling and contributes directly to injection molding cost reduction. Flash defects in of plastic that form at the parting line are another consequence of poor strategy. When mould halves do not align perfectly, or when injection pressure forces plastic into tiny gaps, flash forms and must be removed manually or through secondary operations. At volume, this adds meaningful labor cost. The best approach is to define your parting line during the earliest stages of enclosure design, not as a downstream manufacturing consideration. Place parting lines on non-cosmetic edges where possible. Design draft angles that allow clean release. Eliminate undercuts through geometry changes rather than mechanical mould features wherever feasible.     Case Study: Industrial IoT Startup, Germany Problem: Complex parting geometry required multiple side-actions and non-standard mould split directions to accommodate the enclosure design Impact: Tooling cost increased by €35,000 over initial estimates. Extended lead time for mould manufacture. Fix: Design team simplified the split line geometry, eliminating two side actions through minor enclosure shape changes Result: Tool cost reduced by 20%. Manufacturing setup time shortened. Ongoing maintenance costs have been lowered. Key Insight: Simpler geometry is always cheaper to tool and easier to maintain   3. DFM for Injection Molding: Snap-Fit vs Screws to Reduce Assembly Cost How to reduce assembly cost in hardware products using snap-fits Every fastener in your assembly has a cost. Not just the cost of the screw itself, though that adds up at volume, but the cost of the driver tool, the assembly time per unit, the torque specification and quality check, the potential for cross-threading or over-torquing, and the service time when a field technician needs to open the device. This is why the decision between snap fit design vs screws has a direct impact on overall manufacturing efficiency and cost. Snap-fit joints, when designed correctly, eliminate most of these costs. A well-designed cantilever snap-fit can be engaged in a fraction of a second with no tools, no fasteners, and no torque variability. At a production volume of one million units, reducing assembly time by thirty seconds per unit translates directly into thousands of dollars in labor savings making it a key strategy in IoT enclosure design for manufacturing. The trade-off is engineering complexity and material discipline. Snap-fits require careful geometry to achieve the right deflection force without fracturing the feature. They require consistent material properties, particularly

7 DFM Engineering Techniques to Reduce IoT Enclosure Manufacturing Costs Before Production Read More »

8 Smart Ways to Build a Cost-Effective Hardware MVP Without Over-Engineering

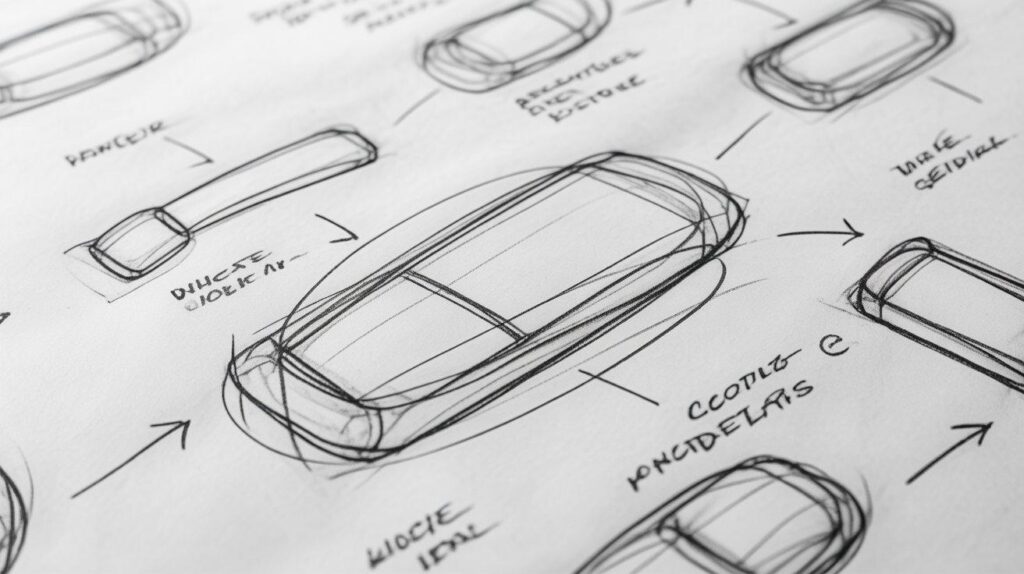
Building a hardware MVP is exciting — until the invoices start arriving. If you’re wondering how to build a cost-effective hardware MVP, the single biggest mistake hardware founders make? Treating the MVP like the final product. This leads to over-engineering, feature bloat, and budgets that spiral out of control before you’ve even validated your first assumption. If you need expert guidance, explore our mechanical product engineering services for startups in the US and Europe for professional support. This guide breaks down 8 proven ways to cut costs, move fast, and build only what matters. 01  Start with a Low-Fidelity Concept — Don’t Jump to CAD Before you open any design software, spend time with pen and paper. Sketching forces you to think through your idea at a structural level without getting lost in technical details that don’t matter yet, making it one of the most effective low-cost hardware product development strategies.. Paper sketches eliminate costly back-and-forth in early design reviews, while foam models and cardboard mockups expose spatial and ergonomic issues immediately. Low-fidelity concepts take hours to iterate — CAD rework takes days and dollars. Stakeholder feedback is also faster and more honest when there’s no polished render to distract. 02  Build a Functional Mockup Before Engineering for a Cost-Effective Hardware MVP A functional mockup doesn’t need to look good — it needs to reveal problems. Physical mockups expose issues that even the best digital design tools miss entirely. Use cardboard, foam, or rough 3D-printed shells to test form and fit, validate spatial proportions, and observe how users actually holds, press, and carry the product. Sharing these early mockups with potential users before any engineering investment gives you real feedback when changes are still cheap and fast, helping reduce hardware prototyping costs for startups and supporting a cost-effective hardware MVP. 03  Focus Only on “Must-Have” Features — Avoid Scope Creep Scope creep is the silent budget killer in hardware MVPs. Every feature you add doesn’t just cost design time — it multiplies across prototyping, testing, sourcing, and production, often driving costs up by 2–3×. To avoid over-engineering in hardware product design, For every feature on your list, ask: “Will the product fail to validate without this?” If the answer is no, remove it from the MVP scope entirely. Fancy displays, premium finishes, and advanced mounting systems can all wait. Prioritise only the features that directly test your core value proposition — nothing else.   CASE STUDY 1 — Feature Creep US-Based Smart Home Startup Cut MVP Cost by 42% THE PROBLEM A California-based IoT startup was building a smart home sensor loaded with a touch display, LED indicators, a multi-layer enclosure, and an advanced mounting system. Their MVP cost estimate came in at $38,000+ — primarily because they were designing a final product rather than a minimum viable prototype. WHAT WE CHANGED The team removed the display entirely and replaced it with a mobile app interface, simplified the enclosure to a 2-part snap-fit design, and eliminated every non-critical feature from the build list. RESULT MVP cost dropped from $38,000 to $22,000 — a 42% savings. The team moved 3 weeks faster through the prototyping cycle and secured early pilot customers ahead of schedule, clearly demonstrating how to reduce hardware prototyping costs for startups. Key Insight: Features don’t validate products. Use-cases do. 04.  Choose the Right Prototyping Method Early for a Cost-Effective Hardware MVP Using the wrong prototyping method at the wrong stage is one of the most common budget mistakes in hardware development. Choosing the best prototyping methods for hardware MVP is critical – 3D printing is fast and low-cost, making it ideal for early iterations and form validation. CNC machining is precise and functional, best suited for later-stage validation once your geometry is near-final. Laser cutting works well for flat components and enclosures at a low cost. Injection moulding should be reserved entirely for production — never used at the MVP stage. 05  Design with Manufacturing in Mind (DFM Early) Design for Manufacturability in early stage hardware isn’t something you think about after the design is done — it’s something you bake in from day one. Late-stage DFM fixes are expensive, slow, and demoralising. Align wall thickness to your target manufacturing process from the start, add draft angles to injection-moulded parts during initial design rather than after the fact, and use ribs and gussets instead of thick walls for a stronger and cheaper result. Considering production volume early when choosing materials and processes can save enormous rework costs down the line.   CASE STUDY 2 – DFM Early Germany-Based Industrial IoT Startup Avoided €25K Redesign THE PROBLEM An industrial IoT company designed an enclosure with walls over 4mm thick, no draft angles, and complex internal mounts. The prototype worked fine in isolation — but when they moved to manufacturing, it failed completely. DFM had been ignored during the entire MVP stage. WHAT WE CHANGED The team optimised wall thickness to a uniform 2mm, added proper draft angles throughout the design, and rebuilt the internal structure using ribs rather than solid walls — all changes that should have been made from day one. RESULT They avoided tooling rework worth €25,000+ and reduced their per-unit manufacturing cost by 28%. The transition to injection molding then proceeded smoothly and on schedule. Key Insight: If DFM is ignored early, you pay for it later — expensively. Not sure if your MVP is over-engineered? Get an expert design review before you move to prototyping — avoid costly mistakes early. Get a Free MVP Review → 06.  Prototype in Iterations — Don’t Aim for Perfect The most expensive prototype is the one you tried to make perfect on the first attempt. Rapid iteration is how real hardware products get built — learn, improve, repeat. Build the simplest version possible and test it immediately. Each round of testing gives you actionable, real-world feedback that you can incorporate before the next build which is essential for achieving a cost-effective hardware MVP. Multiple low-cost iterations beat one

8 Smart Ways to Build a Cost-Effective Hardware MVP Without Over-Engineering Read More »

9 Reasons Product Designs That Look Perfect Still Fail in Manufacturing

Something can seem perfect while being drawn up. Even if digital plans are sharp, things operate as expected at first, yet real trouble often begins later. However, when the product enters large-scale production, many companies experience unexpected product design failures in manufacturing. It shows up since making prototypes isn’t anything like full-scale fabrication. One moment you’re shaping parts with adaptable methods – CNC mills, say – or layering them in a 3D printer. The next shift arrives: factories need uniform routines that run without surprise. That transition often challenges many teams when moving from test models to large production batches. Problems arise when designs assume perfect consistency, but real manufacturing introduces natural variations A lot of smaller factories face setbacks when problems pile up – costs rise, timelines stretch, sometimes everything halts before launch. Spotting frequent roadblocks early lets teams shape designs with real-world building in mind right away. This is why many companies turn to specialized engineering partners like Engon Technologies to review designs early and ensure they are ready for scalable production. Working with experts who understand design for manufacturing (DFM) and production realities can help prevent these costly problems. For US manufacturing SMEs looking to scale production efficiently, engineering support services such as engineering outsourcing for US manufacturing SMEs can help validate designs, optimize manufacturability, and reduce the risk of product design failures before production begins. The Prototype vs Production Reality Prototypes are typically produced in low quantities using flexible processes like 3D printing, CNC machining, or manual assembly. Mass manufacturing, however, relies on repeatable processes such as injection molding, stamping, casting, and automated assembly. This difference is why many design to manufacturing problems appear only after scaling production. Manufacturing Readiness Importance for Small Businesses Ready to make means the plan works every time, without hiccups. Skip that step; firms run into trouble like delays or wasted parts Production delays Increased scrap rates Tooling redesign costs Supplier conflicts This is why many SMEs seek engineering outsourcing for manufacturing to validate designs before moving into large-scale production. The Hidden Price of Mistakes in Making Things Mistakes spotted while designing might set you back a few hundred bucks to correct. When found later – once things are rolling – it could mean losing way more than that. Understanding the root causes of product design failures in manufacturing can help companies avoid these costly setbacks. Ignoring DFM Principles: A Common Cause of Product Design Failures in Manufacturing A frequent error in design for manufacturing shows up when performance grabs all the attention, leaving production limits out of sight. Though sleek function might look ideal, real-world building often hits roadblocks if practical assembly isn’t weighed early. Details like material choice or part complexity slip through when speed and output take center stage. Without balancing both sides, even brilliant concepts stall before reaching customers. Built right, a product moves smoothly through production when tools and methods match its design. Yet if shapes get too tricky – like sharp angles, narrow sections, or sunken areas – machining slows down or breaks down. Smooth paths depend on early checks, not late fixes. Odd forms often demand special tooling, more time, and higher cost. When geometry ignores reality, output stumbles before it starts. Planning ahead avoids traps hidden in corners and curves. These design for manufacturability issues significantly increase production costs and manufacturing time. A manufacturing-friendly design simplifies geometry, reduces machining operations, and minimizes unnecessary complexity. Mini Case Study A Texas industrial equipment startup developed a precision aluminum housing that performed perfectly during prototype machining. When production started, manufacturers discovered impossible tolerances and extremely complex tool paths. After redesigning the component using DFM analysis, machining time dropped by 38% and production became scalable. Unrealistic Tolerances That Lead to Product Design Failures in Manufacturing Many engineering teams design products with extremely tight tolerances to achieve precision. However, unrealistic tolerances often lead to serious manufacturing tolerance issues during production. One part might fit just fine on its own. Yet when several come together, tiny differences add up – shifting things out of place. Sometimes those shifts go beyond what machines at a factory can handle. That mismatch leads to more pieces getting tossed aside, never making it into the final build. Quality wobbles as a consequence. Effective tolerance engineering balances precision with manufacturability. Instead of forcing unnecessary accuracy, engineers should design tolerances that reflect realistic production capabilities. Mini Case Study A German automation company designed a robotic assembly component with extremely tight tolerances. Suppliers struggled to maintain consistency during volume production. After performing tolerance stack-up analysis and adjusting specifications, manufacturing yield improved by 22%. Prototype Materials Don’t Match Production Materials Material differences are a major reason for prototype-to-production failure. When building early models, teams might pick quick-to-shape stuff like printed resin or bendy plastic. Still, what gets used in the real product can handle stress, heat, or movement in another way entirely. For example, a part designed for 3D-printed resin may behave differently when produced using injection-molded ABS. Without proper material engineering analysis, these differences can lead to structural failures or performance issues. Mini Case Study A California consumer hardware startup prototyped parts using 3D-printed resin but later switched to injection-molded ABS for production. The design lacked reinforcement for the new material, causing failures during stress testing. Engineers redesigned the structure to support the production material. Designs That Ignore Assembly Complexity Cause Product Design Failures in Manufacturing Another major contributor to design to manufacturing problems is ignoring how a product will actually be assembled. One way to cut down on work during building is to make things easier to put together. Fewer pieces mean less trouble fitting them later. When a product uses too many fasteners or tiny bits, it takes longer to build. Time spent putting parts together adds up quickly. More hands-on effort means higher expenses in the long run. Fewer pieces mean less clutter during build. With room to move, tools reach spots faster. Order matters – step-by-step setup cuts delays. Efficiency climbs

9 Reasons Product Designs That Look Perfect Still Fail in Manufacturing Read More »

Why Engineering Outsourcing Fails SMEs: 10 Hidden Risks That Multiply Costs Later

Out there among smaller factories, sending design work overseas often looks like a win on price. Cheaper pay by the hour might catch your eye first – then quicker drawings start piling up in your inbox. Specialized know-how shows up where you didn’t expect it, making everything seem leaner than before. But behind those numbers sits something less clear: whether savings last when things get complicated. But engineering outsourcing failures for SMEs often surface later — during tooling, pilot production, or market launch — when corrections are exponentially more expensive. Unlike large corporations, SMEs operate under tight margins, compressed timelines, and high product dependency. A single round of engineering cost overruns can destabilize the entire business. Many manufacturers today explore engineering outsourcing to access global expertise and control development costs. Companies like Engon technologies work with manufacturing SMEs to provide engineering support that aligns design decisions with production realities. However, outsourcing without the right structure can introduce hidden risks. Businesses looking to understand how to implement engineering outsourcing for US manufacturing SMEs often focus on balancing cost efficiency with manufacturing readiness to avoid expensive redesigns later in the product development cycle. Here come the top ten dangers small firms run into when they outsource engineering work, minus a plan focused on actual output. Limited Financial Buffer A Major Cause Engineering Outsourcing Failures for SMEs Why SMEs Cannot Absorb Engineering Cost Overruns Big manufacturers set aside extra funds just in case. Meanwhile, smaller ones skip that step entirely. When engineering cost overruns occur due to outsourced design errors, small businesses struggle to absorb: Rework costs Additional validation cycles Tooling modifications Extra charges for longer company help These SME engineering budget constraints mean even minor outsourcing engineering risks can cascade into severe financial stress. Cash Flow Disruption Caused by Rework Cycles Rework creates invisible financial strain: Payment to offshore teams continues. Toolmakers charge revision fees. When things kick off, it takes longer than planned. Revenue inflow stalls The resulting cash flow impact is often more damaging than the actual redesign cost. This explains how engineering outsourcing failures affect SME finances far beyond initial projections. Hidden Engineering Outsourcing Costs Beyond Quoted Pricing Many SMEs underestimate hidden engineering outsourcing costs for small businesses, including: Extra iterations beyond scope Engineering revision loops Communication overhead Vendor realignment meetings Documentation corrections These compound into substantial development budget loss. Organizations that successfully outsource engineering usually combine cost efficiency with strong production validation processes. Many manufacturers follow structured engineering frameworks developed by experienced partners such as Engon Technologies, who work closely with Engineering outsourcing for US manufacturing SMEs to align product design with real production requirements. Financial Risk Modeling Before Outsourcing Engineering Outsourcing considerations for small businesses Model worst-case rework costs Estimate tooling delay scenarios Calculate cash reserve thresholds. Build contingency buffers Risk modeling reduces outsourcing engineering risks dramatically. Single Product Dependency in Engineering Outsourcing Failures for SMEs Revenue Concentration in Single-Product SMEs People running small businesses often pin their hopes on a single standout item. Waiting stops money from coming in. This increases exposure to product engineering outsourcing problems. How Outsourcing Delays Destroy Launch Momentum Engineering slippage causes: Product launch delay Lost distributor confidence Marketing campaign waste Channel fatigue This is precisely how outsourcing delays kill SME product launches. Market Window Loss in Competitive Manufacturing Sectors In fast-moving sectors: Certification windows close Competitors capture early adopters. Pricing advantage disappears This market window loss creates a permanent disadvantage. Late-Mover Disadvantage Due to Engineering Slippage Being second to market often means: Lower margins Price wars Weak brand perception This is the true first-mover disadvantage resulting from outsourcing delays impact SMEs. Risk Mitigation Through Production-First Planning SMEs must adopt: Production readiness checkpoints Parallel supplier alignment Design freeze governance Milestone-based release structure This reduces engineering outsourcing risk for single-product companies. Lack of Manufacturing-First Engineering CAD Design vs Production Engineering Reality People selling tools often care more about drawings than building stuff easily. This is where manufacturing engineering outsourcing breaks down. Design that works in software may fail in: Mold flow Assembly ergonomics Fixture accessibility Tolerance stack-ups DFM/DFA Gaps in Outsourced Product Design Outsourcing DFM Engineering Without Oversight Wall thickness variations create mold defects. More intricate assembly means higher wages paid for work time. Tool wear accelerates These design for manufacturability issues drive long-term inefficiencies. Prototype Success Masking Production Failure A 3D-printed prototype rarely reveals: Shrinkage issues Cycle time problems Long-term durability risks This is a classic case of outsourced product design failures. Ignored Manufacturing Constraints Common overlooked constraints: Machine capacity limits Injection pressure thresholds Tool steel wear rates Surface finish feasibility Such blind spots define engineering outsourcing without manufacturing knowledge. Production Readiness Review Framework SMEs must implement: Tolerance stack-up validation Tool feasibility assessment Assembly simulation Supplier feasibility sign-off On boarding tooling team in all stages This ensures production readiness before tooling release. Tooling Rework Costs in Engineering Outsourcing Failures for SMEs Post-Tooling Design Changes and Their Root Causes When tools are made, adjustments cost more. Common causes: Poor tolerance analysis Incomplete DFM review Late-stage requirement change Communication errors These lead directly to tooling rework costs. In many cases, they become major contributors to engineering outsourcing failures for SMEs, particularly when outsourced design teams lack close alignment with real manufacturing conditions and production constraints. Mold Rework Cost Breakdown Typical mould rework includes: Few repairs tackle holes by reshaping metal after heat joins parts together. Core insert modification Cooling channel redesign Surface texture correction The mold rework expense often exceeds original savings. How Poor Tolerance Analysis Triggers Tooling Modification Tolerance stack-up failures cause: Assembly interference Warping Component misalignment Leading to high tooling modification cost. Tooling Validation Checkpoints Before Release Before cutting steel: Conduct a tolerance simulation Validate DFM review Freeze specifications Secure toolmaker approval This reduces tooling rework caused by poor engineering outsourcing. Communication Gaps Causing Engineering Outsourcing Failures for SMEs Offshore Time-Zone Decision Lag With offshore teams: Questions get answered within a day or two. Escalations get delayed Issues compound silently These time zone delays amplify offshore engineering outsourcing problems. Specification Ambiguity

Why Engineering Outsourcing Fails SMEs: 10 Hidden Risks That Multiply Costs Later Read More »

7 Hidden Ways Cheap Engineering Causes Manufacturing Rework Cost in US and Europe

When making things, tight budgets often lead teams to choose less expensive engineering help. At first glance, that choice seems like it cuts expenses. Yet down the line, problems start piling up during actual building work. The so-called budget option tends to trigger repeated design changes, fixes to molds and tools, parts that do not align properly, and shrinking profits-especially across manufacturing programs in the US and Europe, where labour, tooling, and compliance costs are significantly higher. What initially appears as savings often results in rising manufacturing rework cost, especially when pilot runs expose flaws, scaling gets shaky, suppliers clash, changes pile up. Many companies exploring engineering outsourcing for US manufacturing SMEs underestimate how early design shortcuts translate into downstream production instability. At first glance, cheap outsourced engineering seems fine, just numbers on a page. Only after things move forward do the real expenses emerge. When trouble hits, money can’t be pulled back, timelines hold firm, and fixes demand more time and cash. This piece reveals seven unseen ways low-cost engineering hikes up rework expenses in production – while showing fixes via smart design-to-manufacturing alignment. What looks like savings at first often backfires later downstream. What Drives Manufacturing Rework Cost in Production in US and Europe? Something going wrong on the factory floor does not come from a single disaster. Small oversights pile up, especially when planning how parts go together. Decisions made too quickly in design often ignore how things actually get built. Tolerances that seem fine on paper cause trouble once assembly begins. Methods intended to simplify manufacturing sometimes have the opposite effect when applied without care. Many structured engineering firms such as Engon Technologies emphasize early production validation precisely to prevent these downstream disruptions. Over time, these misalignments directly increase manufacturing rework cost, especially when assembly variation, scrap, and inspection sorting become routine rather than exceptions. The Real Cost of Engineering Change Orders (ECOs) A single change in engineering might keep things moving forward. Yet when those changes multiply fast – midway through testing or full-scale builds – it often points back to early oversights. Mistakes made while shaping the design tend to surface later as a flood of adjustments. What looks like progress can actually be catching flaws too late. Late ECOs create: Tooling modification cost Production line stoppage due to design errors Supplier renegotiation Revalidation and FAI repetition Inventory scrap and rework Few realize how fast expenses climb when engineers alter designs late in the process – tooling shifts right after documents get updated, while suppliers scramble to adapt. Assembly methods reshape just as inspections tighten. One tweak sparks chain reactions across every corner of production, rapidly increasing manufacturing rework cost across tooling, validation, and supply chain operations. How Poor DFMA Increases Scrap and Revalidation One thing about checklist-driven DFM reviews – they miss the point of real DFMA work. Surface-level inspections tend to overlook what matters. Validation of process capability using Cp and Cpk Statistical tolerance stack-up Ramp-up yield modelling Supplier process variability When DFMA lacks quality, output takes a hit right away. Parts get tossed more often than before. Testing starts again, without warning. The path to steady manufacturing wobbles. Tools that model production flow are available, yet still ignored. Low-cost design teams skip them, even when managing high-volume programs, leading to a sharp rise in manufacturing rework cost during validation and ramp-up. Tolerance Errors and Their Impact on Assembly Yield Fine margins shape spending more than most expect. Cost bends where precision begins. Too much tightness in specs makes machining pricier. When tolerances are too loose, parts won’t fit right, causing fixes later. Getting it just right means using GD&T smarter, backed by number patterns that predict variation. A few microns might seem tiny when you’re holding a prototype. Yet multiply that across ten thousand units, and suddenly gaps appear where nothing fits right. One overlooked curve, one unchecked edge – soon the line slows down. Mistakes don’t grow loud. They spread quietly, like cracks in plastic under heat, gradually driving up manufacturing rework cost across assembly, inspection, and scrap management. How Cheap Engineering Triggers Engineering Change Orders Out on its own, budget-focused design rarely talks to the machines it needs. Without that link, fixes pile up later because nobody asked the people who built things. Mistakes repeat when plans ignore what happens after decisions are made. This disconnect is common in poorly structured engineering outsourcing for US manufacturing SMEs, where design teams operate far from real production constraints. Late Design Changes After Tooling Investment Heavy expenses hit hard when tools change post-mold cut. After money gets locked in, small tweaks demand fresh spending. Tool-safe design compromise Mold welding or re-machining New inserts Additional sampling A surprise risk showing up post-funding burns through budgets faster than almost any other mistake in design work. ECO Impact on Production Schedules When suppliers deliver late, production timelines shift without warning. Inspection sign-offs drag; everything waits behind them. Machines run only after the investments pay back their base cost. Timing bends around each of these anchors. An eco launched amid a ramp-up Delays product launch Increases validation cost Triggers supplier-driven redesign Reduces forecast confidence When a product launches late, the money lost usually surpasses what was saved during development. Cost of Revalidation and Tool Modifications Each change to the tools kicks off a fresh start First Article Inspection (FAI) PPAP documentation Capability studies Functional testing Costs from revalidating manufacturing grow fast. Early savings in design vanish when tests are redone again and again. Why Superficial DFMA Increases Manufacturing Rework Cost in US and Europe Checklist-Based DFM vs Engineered DFMA There is a fundamental difference between a DFM checklist and real DFMA engineering. A checklist might confirm: Minimum draft angles Basic machining feasibility Standard material selection Engineered DFMA analyzes: Process drift and variation Cp, Cpk alignment with functional tolerances Digital manufacturing simulation Supplier capability mapping The difference between DFM checklist and real DFMA engineering determines whether a design survives mass production. Process Capability (Cp, Cpk) Misalignment

7 Hidden Ways Cheap Engineering Causes Manufacturing Rework Cost in US and Europe Read More »

Is Your Product Really Ready for Mass Production?

9 Common SME Pitfalls Derailing US & European SMEs Many SMEs across the United States (US) and Europe (EU) believe they are ready for mass production because the prototype works, customers are interested, and initial builds look promising. Yet scale-up failure is rarely caused by a single catastrophic mistake. It is usually the cumulative result of weak manufacturing readiness discipline across design, suppliers, tooling, cost, and validation. Without a structured Production Readiness Audit for SMEs, these hidden scale risks often remain invisible until ramp-up. This audit is a core part of our broader framework at Engon Technologies for engineering outsourcing for US manufacturing SMEs, helping manufacturers de-risk scale early. Below are nine systemic pitfalls that repeatedly derail otherwise promising products during industrialization. 1. Prototype ≠ Production-Ready in US and European Manufacturing One of the most common SME mistakes is confusing functional validation with manufacturing validation. A prototype proving that the product works does not mean the design is production ready. Functional Validation vs Manufacturing Validation Engineering Validation Test (EVT) builds confirm functional performance. Design Validation Test (DVT) verifies compliance and robustness. Production Validation Test (PVT), however, validates manufacturability, repeatability, and yield under line conditions. Recognizing this gap early is exactly why a Production Readiness Audit for SMEs should feed into your engineering outsourcing strategy — for example, our structured services for engineering outsourcing for US manufacturing SMEs build readiness into every phase. The difference between prototype and production design lies in process robustness, tolerance capability, assembly efficiency, and material stability—not just performance. Prototype Materials vs Production Materials SMEs often use substitute materials in prototypes: CNC aluminum instead of die-cast, 3D prints instead of injection-molded parts. These materials behave differently under stress, heat, and assembly load. When production materials are introduced, dimensional shifts and failure modes appear. Hand-Built vs Line-Built Differences Hand-built assemblies tolerate rework, fitting, and technician intuition. Line-built units depend on standardized work, fixtures, takt time, and operator skill consistency. Many pilot build failures in SMEs stem from ignoring this transition. Design Hardening for Volume Design for mass production requires tolerance optimization, fastening simplification, poka-yoke features, and Cp/Cpk-driven tolerancing. Without this hardening, why prototypes fail in mass production becomes painfully obvious during ramp-up. 2. DFMA Is Treated as a One-Time Check + Tolerance Stack-Ups Ignored DFMA (Design for Manufacturing and Assembly) is frequently misunderstood as a checklist exercise rather than a cross-phase discipline. DFMA vs DFM vs DFA DFM focuses on manufacturability of individual parts. DFA addresses ease of assembly. DFMA integrates both. Treating DFM and DFA separately causes interface failures and assembly tolerance issues. DFMA as an Iterative Process DFMA analysis must occur during concept, detailed design, and pre-tooling phases. It must also be updated after supplier feedback and pilot builds. Static DFMA documentation leads to DFMA failures in mass production. Assembly Sequence-Driven Design Parts must be designed around real assembly flow. Excess fasteners, orientation ambiguity, and inaccessible joints create design for assembly errors. Line balancing constraints must inform geometry and fastening strategy. Part Count Reduction & Functional Integration Reducing components improves cost and reliability—but excessive consolidation may complicate tooling or increase scrap sensitivity. DFMA best practices for scale-up require balancing integration with process capability. Tolerance Stack-Up Analysis Tolerance stack up analysis is critical. Worst-case stacking leads to over-constrained fits. Statistical stack-ups require Cp/Cpk alignment. Poor datum strategy creates cosmetic and functional misalignment. Tolerance stack up problems in assemblies often appear only during ramp. Ignoring tolerance discipline results in yield loss, shimming, forced fits, and post-tooling ECOs. 3. Tooling Reality Is Ignored CAD intent rarely reflects tooling design constraints. Tool Design Constraints vs CAD Draft angles, undercuts, parting lines, gate location, and ejection strategy define manufacturability. Mold design limitations frequently contradict aesthetic or structural assumptions made in early design. Mold Flow & Steel Selection Mold flow analysis identifies weld lines, sink risk, and fill imbalance. Tool steel selection determines life expectancy and wear resistance. Poor choices lead to tooling cost overruns and premature degradation. Cycle Time Assumptions Cycle time drives cost. SMEs often assume theoretical cooling times that prove unrealistic. Real-world thermal gradients, part geometry, and machine capability extend cycle time, eroding margin. Early tooling feasibility analysis prevents why tooling fails after design freeze scenarios. 4. Supplier Capability Is Assumed, Not Verified Supplier capability assessment must be evidence-based. Cp, Cpk and Drawing Alignment Machine capability must align with drawing requirements. If a drawing specifies ±0.05 mm but supplier Cp/Cpk supports ±0.12 mm, yield loss is inevitable. Supplier Audits Technical audits verify process controls, maintenance systems, calibration, and training. The supplier qualification process should include statistical validation, not just commercial evaluation. A structured Production Readiness Audit for SMEs formalizes this validation by reviewing Cp/Cpk evidence, SPC discipline, maintenance systems, and process controls before volume ramp. It ensures supplier capability is statistically verified rather than commercially assumed. Silent Substitutions Manufacturing supplier risk increases when suppliers substitute materials or processes without formal approval. Regional supplier maturity differences can compound risk. To avoid supplier failures during scale up, SMEs must verify—never assume—capability. 5. No Process FMEA Before Scale Process FMEA (PFMEA) is often neglected until defects appear. DFMEA vs PFMEA DFMEA identifies design risks. PFMEA manufacturing identifies process-level manufacturing failure modes. Identifying Failure Modes Process risks include misalignment, torque variation, contamination, incorrect assembly order, and operator error. Each must be ranked by severity, occurrence, and detection. Linking PFMEA to Control Plans PFMEA manufacturing outputs must drive control plan manufacturing documentation: inspection frequency, error-proofing, and reaction plans. Using PFMEA during pilot builds allows validation of risk assumptions. Updating PFMEA during ramp-up supports structured production risk management. Missing PFMEA is a common cause of manufacturing defects due to missing PFMEA discipline. 6. Cost Is Estimated, Not Engineered Quoting suppliers is not manufacturing cost engineering. Should-Cost Modeling Should cost analysis decomposes BOM cost breakdown, cycle time, scrap rate, labor, overhead, and tooling amortization. It validates whether quoted cost aligns with process physics. Production Cost Drivers Cycle time, yield loss, scrap sensitivity, and labor content are primary production cost drivers. Small tolerance changes may double

Is Your Product Really Ready for Mass Production? Read More »

Benefits of digital engineering outsourcing USA

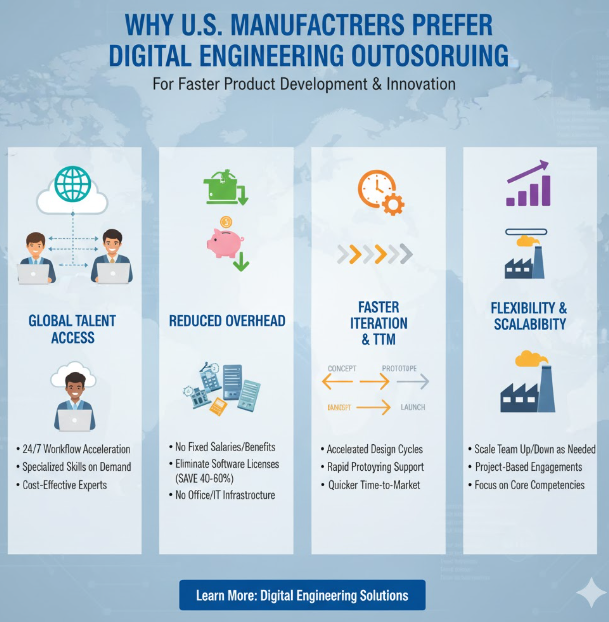
Why U.S. Manufacturers Prefer a Digital Engineering Outsourcing Company for Faster Product Development

In the competitive U.S. manufacturing landscape, companies face constant pressure to launch innovative products quickly. Whether in consumer electronics, industrial systems, smart devices, automotive components, or industrial machinery, every segment demands speed, precision, and flexibility. Traditional engineering systems cannot keep up with market expectations. As product lifecycles shorten and customer demands increase, manufacturers increasingly turn to digital engineering outsourcing USA firms to speed up development, lower engineering costs, and stay ahead of the competition.  Digital engineering has evolved beyond simple CAD modelling. It now includes simulation, automation, digital twins, generative design, virtual prototyping, and collaborative cloud platforms. By outsourcing these functions, manufacturers access skilled engineers, cutting-edge tools, and efficient processes without the burden of building expensive internal teams. Many companies also rely on specialized mechanical engineering design services for handling complex CAD and simulation workloads. Engon Technologies has become a preferred partner for U.S. companies looking for quicker, more flexible, and reliable product development support. This article discusses why U.S. manufacturers choose digital engineering outsourcing companies and how this strategy helps shorten time-to-market while maintaining high engineering quality.  The Growing Shift Toward Digital Engineering USA Trends in U.S. Manufacturing How U.S. Manufacturers Improve Speed and Accuracy with Digital Engineering USA U.S. manufacturers are undergoing a digital transformation in designing, developing, and launching products. Digital engineering has replaced traditional methods. Virtual Prototyping and Digital Twins in Digital Engineering USA This shift allows companies to create virtual prototypes, simulate real-world behaviour, and validate designs long before physical testing begins. With advanced tools and digital product development services, companies can reduce manual tasks, spot errors early, and iterate quickly.  Rather than relying solely on internal teams, manufacturers now prefer to work with outsourcing partners specializing in engineering design, simulation, CAD development, prototyping, and automation. These partners bring global expertise and deep engineering knowledge that enable faster execution. This trend reflects a broader industry movement where data-driven engineering and outsourced collaboration become vital for achieving innovation in a competitive market.  Why U.S. Manufacturers Choose Digital Engineering Outsourcing USA Companies Faster Time-to-Market with Digital Engineering Outsourcing USA The primary reason U.S. manufacturers opt for outsourcing is speed. Collaborating with experienced digital engineering outsourcing firms significantly shortens product development timelines. Internal engineering teams often face heavy workloads, limited skill sets, and time-consuming processes. Outsourced teams offer immediate access to resources, allowing companies to move from concept to prototype faster than ever.  Outsourcing speeds up new product launches by enabling multiple design and simulation tasks to run simultaneously. Digital engineering allows teams to validate concepts through virtual simulations, quickly refine CAD models, and identify issues early. Reducing delays is crucial for manufacturers in fast-moving markets, where saving even a week can create a significant competitive edge.  Access to Specialized CAD & Simulation Talent Through Engineering Outsourcing USA Another reason U.S. companies prefer engineering outsourcing is access to specialized talent. Modern product development requires experts in advanced CAD modelling, CAE simulation, industrial design, materials engineering, digital twin creation, FEA analysis, and design automation. Building such a diverse internal team is costly, slow, and hard to maintain. A digital engineering outsourcing firm provides a global engineering team with all the necessary skills, ensuring manufacturers have specialists available at every step of the product lifecycle. Familiarity with tools like Creo, SolidWorks, CATIA, Ansys, and NX further enhances engineering accuracy and efficiency.  Industry research from the American Society of Mechanical Engineers shows that digital engineering workflows and simulation-driven design significantly improve engineering efficiency and reduce development time. Reducing Engineering Costs with Digital Engineering Outsourcing USA Cost optimization is another major factor driving this outsourcing trend. Hiring full-time engineers, purchasing costly software licenses, investing in digital infrastructure, and maintaining internal R&D departments place a heavy financial burden on manufacturers. Outsourcing offers cost-effective engineering resources, allowing companies to pay only for the services they need. This approach cuts overhead while ensuring quality engineering output. For startups and medium-sized manufacturers, this is particularly beneficial as it helps them compete with larger companies without excessive spending.  Communication efficiency has also improved significantly thanks to modern digital tools. U.S. manufacturers now collaborate smoothly with offshore teams through shared platforms, cloud-based design systems, daily virtual meetings, and real-time file access. Engineering design outsourcing partners integrate well with internal teams and act as an extension of the manufacturer’s R&D department. The result is a unified engineering process where decisions are made faster, documentation improves, and design iterations flow smoothly.  How Digital Engineering Outsourcing from USA Enhances Mechanical Design and CAD Workflows Mechanical design outsourcing has become essential for U.S. manufacturers because it supports everything from concept sketches to production-ready designs. By relying on skilled CAD engineers, manufacturers avoid bottlenecks and ensure that modelling, assemblies, tolerance studies, and detailed drawings are completed accurately. Outsourced CAD design teams manage large assemblies, complex mechanisms, enclosures, sheet metal parts, and plastic components, delivering production-ready models that meet engineering standards.    Mechanical Design Outsourcing Benefits for U.S. Manufacturers Working across diverse industries and various products cultivates powerful cross-functional expertise. his broad exposure allows teams to meet unique industry needs, including smart devices requiring IoT enclosure design services that combine durability with manufacturability., or applying financial rigor to operational logistics. This proficiency is invaluable as it breaks down organizational silos, enabling a holistic view of challenges and opportunities. A cross-functionally proficient team member can effectively translate needs between departments, anticipate downstream impacts, and drive innovation by adopting best practices regardless of their origin. Ultimately, this expertise leads to more efficient processes, better problem-solving, and more successful product outcomes. Small organizations get diverse expertise (tooling engineers, Production engineers, Reverse engineers, Analysis engineers, etc) and best systems & methods under single roof to solve their problems. Strategic Advantages of Offshore Engineering Partnerships for U.S. Companies Using India Engineering Outsourcing Partnering in India opens the door to a vast and diverse talent pool, offering an unparalleled scale of skilled professionals. This strategic access assures a continuous, reliable supply of high-caliber manpower essential for sustained growth and operational scaling. 24/7 Engineering Cycles with India Engineering Outsourcing An

Why U.S. Manufacturers Prefer a Digital Engineering Outsourcing Company for Faster Product Development Read More »