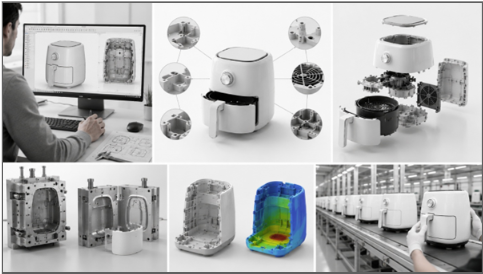
sualiha

7 Ways Industrial Design Drives Premium Perception & Startup Funding

The Industrial Design Strategy: Engineering Premium Perception and Venture Success In the competitive hardware landscape, Industrial Design (ID) is a strategic lever, not a cosmetic layer. It functions as the primary medium through which a startup communicates trust, execution maturity, and perceived quality before a single feature is demonstrated. This is where industrial design services for hardware startups play a critical role in shaping early perception and differentiation,especially when integrated with robust mechanical product engineering support for startups in the US and Europe. In crowded hardware categories, the products that succeed are rarely defined only by technical sophistication. They are the products whose form language, interaction quality, and material execution feel resolved from the very first interaction. This article explores seven dimensions of industrial design that separate forgettable products from iconic ones, and underfunded startups from well-backed ventures. For hardware startups, this is where the right design partner becomes critical. From concept development to manufacturing readiness, an experienced end-to-end product design support ensures that every decision—from ergonomics to materials to assembly—aligns with user expectations, investor confidence, and scalable production. 1. Human Centric Form: Ergonomics as Success Driver in Industrial Design Services for Hardware Startups Elevated industrial design begins with the end-user’s physical and emotional interaction with the product. Following Dieter Rams’ principle that good design makes a product useful, form development must resolve physical comfort, cognitive clarity, and intuitive interaction simultaneously. This is where ergonomic product design services become essential in translating human behavior into practical, user-centered form. If a product does not integrate naturally into how a person moves, holds, or interacts with objects, no amount of engineering sophistication or visual refinement can compensate for that friction. Tactile Friction: Compact, intuitive form factors reduce the friction between the user and the device through ergonomic geometry and considered physical affordances. Retention: Products that integrate seamlessly into daily behavioral routines through refined ergonomics encourage repeat usage, the ultimate metric of hardware adoption. Longevity: Designs rooted in authentic human behavior are inherently more sustainable because they encourage repairability, prolonged usability, and reduced product obsolescence. Ergonomics is not a finishing layer within industrial design. It is the foundation of meaningful product interaction. 2. Visual Semiotics: The 5-Second Impression in Industrial Design Services for Hardware Startups Users and investors form critical judgments about a product within seconds. That perception window is governed by visual semiotics, where surface discipline, proportion control, and reductive form language communicate quality before functionality is experienced. This is where industrial design services for hardware startups play a crucial role in shaping first impressions that influence both market trust and investor confidence. Clean geometry, controlled surfacing, and considered minimalism are not purely aesthetic decisions. They signal intentionality, engineering confidence, and design maturity —an approach achieved through hardware product design services that align form and function from the very beginning, resulting in products that are both functional and visually coherent. Dieter Rams articulated this through his principle that good design is “as little design as possible.” Removing unnecessary visual complexity creates stronger visual hierarchy and more coherent product semantics. Minimalist Ethos: Clean lines, balanced proportions, and controlled detailing communicate that the development team values precision and design discipline. Execution Signal: A deliberate visual identity communicates market readiness, whereas unresolved form language signals experimentation rather than commercial maturity. For startups, visual refinement influences not only consumers, but also investors, retail buyers, and manufacturing partners long before functional evaluation begins. 3. CMF: The Sensory Vocabulary of Value in industrial Design Services for Hardware Startups Color, Material, and Finish (CMF) is the sensory language that sustains the initial visual impression throughout every subsequent interaction. CMF strategy influences tactile perception, material authenticity, and long-term product value while also aligning closely with modern design for manufacturability services that balance aesthetics, scalability, and production efficiency. Matte textures, brushed metals, and glass interfaces communicate a level of tactile sophistication associated with premium hardware categories. By contrast, low-grade glossy plastics create a fundamentally different perception in both the hand and the mind. Premium Tactility: Matte finishes, brushed metallic surfaces, and glass interfaces provide a tactile weight and sensory refinement the human mind associates with premium quality. Material Integrity: High-quality materials maintain structural and aesthetic consistency under stress and age with greater visual dignity than inexpensive plastics. Ethical Sourcing: Contemporary CMF strategy increasingly incorporates responsibly sourced materials, recycled substrates, and environmentally conscious finishing systems aligned with evolving consumer expectations. Material selection is no longer purely aesthetic. It is inseparable from performance, sustainability, and brand positioning.     Building a Hardware Product? Work with experienced hardware design experts to improve usability, reduce manufacturing risks, and increase your chances of securing funding. Book a Product Design Consultation → If you are at the stage of prototyping or preparing for manufacturing, this is the point where design decisions have the highest impact on cost, usability, and funding outcomes. Working with a specialised startup product design consultancy can help you validate your design, reduce risks, and accelerate your path to market. 4. Design for Manufacturability (DFM): Scaling Design Intent A visionary product that cannot be manufactured efficiently at scale is not a scalable hardware platform. It remains a prototype. Design for Manufacturability (DFM) is the discipline that bridges conceptual design intent with industrial production reality making it a critical component of modern industrial design services for hardware startups seeking scalable and investment-ready products. Every industrial design decision carries downstream manufacturing implications — from fastening methodology and component architecture to tolerance management, assembly sequencing, and tooling complexity. A forward-thinking product design and development company considers these factors early to ensure products are not only visually refined but also scalable for efficient production. Thoroughness in Detail: Every decision — from join methods to component count — impacts manufacturing efficiency, tooling investment, and downstream production cost. Lean Assembly: Optimizing DFM reduces material waste, simplifies assembly workflows, and preserves industrial design intent throughout scalable manufacturing. Rams emphasized that good design is thorough down to the last detail. DFM is where that thoroughness intersects with industrial production systems. Well-resolved

7 Ways Industrial Design Drives Premium Perception & Startup Funding Read More »

7 Costly IoT Enclosure Design Mistakes That Burn Startup Budgets

Why IoT Enclosure Design Mistakes Increase Injection Molding Cost  You have a brilliant IoT product idea. You have funding, a team, and a rough prototype. But before you ever send a single unit to a customer, your budget is already bleeding out from the inside. The culprit? Your enclosure design—often developed without proper injection molding design input or the support of experienced injection molding design services —can lead to costly mistakes that only appear after manufacturing begins. For hardware startups, the enclosure is rarely the first priority. Engineers focus on firmware, connectivity, and sensors. Designers obsess over the app interface. And the enclosure, the physical shell that holds everything together, gets treated as an afterthought. That is a mistake that costs real money. We have worked with startups across the US and Europe, and we have seen the same painful patterns repeat. —especially for teams looking for mechanical product engineering support for hardware startups Here are the seven most expensive IoT enclosure design mistakes and how to avoid every single one. 1. IoT Enclosure Design Mistake: No Clear Use-Case Definition IP Rating & Waterproof Design Basics Every design decision your IoT enclosure design demands, the material, the sealing, and the mounting points flow directly from one foundational question: Where and how will this device actually live in the real world? Too many startups skip this step. They design in a lab, test in a controlled environment, and assume the field will be forgiving. It never is. Consider whether your device will be mounted on a wall indoors or bolted to a utility pole in the rain. Will it sit on a factory floor with constant vibration or in a hospital room that gets wiped with harsh chemicals? Will users handle it daily, or will it sit untouched for three years? Each scenario demands a completely different enclosure strategy, and getting it wrong means starting over. IP ratings are a good example of this. IP54, IP67, and IP68 are not interchangeable. IP54 handles splashing water; IP67 means submersion up to one meter for thirty minutes. Choosing the wrong rating and you will result in either overspending on unnecessary protection or watching your field devices fail in the first rainy season when a proper waterproof enclosure would have prevented failure.     Case Study: Smart Agriculture Startup, California A California-based smart agriculture startup built the enclosure in a controlled lab environment and shipped the pilot units directly into outdoor farm deployments. Within weeks, water ingress and UV degradation had destroyed 60% of devices, a failure mode that was entirely predictable and entirely preventable. The team faced roughly $45,000 in redesign costs and field replacements before the product was relaunched with an IP67-rated enclosure built from UV-stabilized polycarbonate. The enclosure had never been the problem; the assumptions behind it were. Lesson: Your environment defines your enclosure, not your assumptions   2. Injection Molding Design Mistake: Poor Electronics–Enclosure Integration Electronics Enclosure Design & Antenna Placement The PCB team designs the PCB. The mechanical team designs the enclosure. They share files the week before prototype submission. The result is antennas pressed against metal walls, batteries wedged in with no access panel, and cable routes that require impossible bends common issues in poor PCB enclosure design. Antenna placement deserves particular attention. IoT devices depend on Wi-Fi, BLE, LoRa, and LTE, and signal performance is devastatingly sensitive to nearby materials. A polycarbonate wall has minimal impact. A metal enclosure without carefully positioned antenna clearance can cut signal strength by 40% or more, exactly as the Berlin case below demonstrates highlighting the importance of proper antenna design for IoT. The fix is co-design from day one. Mechanical, electronics, and tool design teams must work on a shared 3D model and align on internal layout constraints before finalising their designs to avoid conflicts and rework.     Case Study: Industrial IoT Startup, Berlin A Berlin-based industrial IoT startup handed off the PCB design and enclosure design to two separate teams working in parallel. By the time the files were merged for prototype submission, the antenna had ended up pressed directly against the enclosure wall, a position that cut signal strength by 40% and caused the product to fail field testing outright. Resolving the issue required a full PCB redesign and a corresponding enclosure modification, a combined loss of more than €30,000. Moving to a co-design model where mechanical and electronics engineers shared a single 3D model from day one limited the problems on the next revision. Lesson: Electronics and enclosure are one system, not two separate projects     Not sure if your enclosure design is aligned with your electronics? Get a quick audit before you move further; catch problems before they become expensive Get an Enclosure Design Review → Injection Molding Cost Mistake: Ignoring Manufacturing Numbers Everything in hardware development is driven by numbers. Production volume determines the manufacturing process, and the chosen process directly defines your design constraints —this is the core of design for manufacturing (DFM).  Designing for 100 units is completely different from designing for 100,000 units. At low volumes, flexible methods like CNC machining or 3D printing are ideal. They require little to no tooling, allow rapid design changes, and help validate functionality and market fit. However, the per-unit cost remains high. At high volumes, processes like injection moulding become viable. While they significantly reduce per-unit cost, they require high upfront tooling investment and strict adherence to design rules such as uniform wall thickness, draft angles, and simplified geometry —factors that directly impact overall injection molding cost. Ignoring this relationship leads to costly mistakes—designs optimized for the wrong process, expensive tooling rework, and production delays,and avoidable manufacturing defects. Startups that involve injection molding design services early can identify these issues before tooling begins, saving significant time and cost during production scaling. In short: Volume → Process → Design. Getting this sequence right is critical to controlling cost and scaling successfully 4. Material Selection Mistake: Choosing the Wrong Material Early ABS vs Polycarbonate for

7 Costly IoT Enclosure Design Mistakes That Burn Startup Budgets Read More »

7 DFM Engineering Techniques to Reduce IoT Enclosure Manufacturing Costs Before Production

Most hardware startups realize the importance of DFM for injection molding only at advanced stages of tooling. At that stage, even minor modifications require expensive tool rework, causing delays and significant cost overruns. DFM is not a checklist to run through at the end of your design process. It is a discipline that must shape every decision from the earliest concept stages. Applied correctly, it reduces manufacturing costs, improves yield, shortens cycle times, and makes your product far easier to scale when the time comes. This is why many global teams now rely on mechanical product engineering for startups in the US and Europe to ensure DFM is embedded right from the concept stage. This article covers 7 proven techniques for injection molding cost reduction, that directly impact manufacturing costs for IoT enclosures with real case studies that show exactly what poor decisions look like in practice, and what thoughtful design can save. 1. DFM for Injection Molding: Costly Gate Design Mistakes How to optimize gate location in injection molding to avoid costly defects In injection moulding, the gate is the entry point through which molten plastic flows into the mould cavity. A well-planned injection molding gate design determines almost everything about how your part fills, where weld lines form, and whether the finished part warps or remains dimensionally stable. There are several gate types to consider: edge gates are simple and low-cost but can leave visible marks; pin gates offer cleaner aesthetics but require more complex tooling; hot runner systems eliminate gate vestiges entirely but carry significantly higher upfront tooling costs. The right choice depends on your part geometry, production volume, and cosmetic requirements, especially when targeting injection molding cost reduction without compromising quality. Flow balance is the critical concept. When plastic enters from an optimally positioned gate, it fills the cavity evenly, pushing air out through vents uniformly, and cooling with consistent shrinkage across the part. Poor gate placement creates race tracking where plastic flows faster through thicker sections and meets itself at weld lines. These weld lines are structural weak points and often cosmetically visible. Using mold flow analysis, engineers can simulate and validate gate positions before committing to tooling. This is not an expensive luxury; it is one of the most cost-effective investments in the entire product development process.     Case Study: Consumer Electronics Startup, United States Problem: Incorrect gate placement caused uneven material flow, leading to high rejection rates and visible warping in the finished enclosures. Impact: Significant scrap costs are accumulating with every production run. Assembly delays and quality control failures. Fix: Flow simulation used to identify optimal gate repositioning. Tooling was modified before high-volume production commenced. Result: Defect rate was eliminated. Approximately $20,000 saved in scrap and rework costs. Key Insight: Flow balance directly determines your cost per accepted part.   02.Parting Line Design Mistakes That Drive Up Tooling Cost How parting line design affects tooling cost in plastic parts The parting line is where the two halves of your injection mould meet. Effective parting line design in injection molding is one of the most consequential design decisions in plastic part development and one that is frequently underestimated by startups unfamiliar with tooling economics. In DFM for injection molding, parting line strategy plays a critical role in controlling tooling complexity and overall cost.Every time your part geometry forces the mould to split in a complex direction, or requires side actions and lifters to release undercuts, your mold design complexity cost increases These mechanisms drive up cost, add machining time, increase mould maintenance requirements, and introduce additional failure points in production. Simpler parting geometry equals cheaper, more reliable tooling and contributes directly to injection molding cost reduction. Flash defects in of plastic that form at the parting line are another consequence of poor strategy. When mould halves do not align perfectly, or when injection pressure forces plastic into tiny gaps, flash forms and must be removed manually or through secondary operations. At volume, this adds meaningful labor cost. The best approach is to define your parting line during the earliest stages of enclosure design, not as a downstream manufacturing consideration. Place parting lines on non-cosmetic edges where possible. Design draft angles that allow clean release. Eliminate undercuts through geometry changes rather than mechanical mould features wherever feasible.     Case Study: Industrial IoT Startup, Germany Problem: Complex parting geometry required multiple side-actions and non-standard mould split directions to accommodate the enclosure design Impact: Tooling cost increased by €35,000 over initial estimates. Extended lead time for mould manufacture. Fix: Design team simplified the split line geometry, eliminating two side actions through minor enclosure shape changes Result: Tool cost reduced by 20%. Manufacturing setup time shortened. Ongoing maintenance costs have been lowered. Key Insight: Simpler geometry is always cheaper to tool and easier to maintain   3. DFM for Injection Molding: Snap-Fit vs Screws to Reduce Assembly Cost How to reduce assembly cost in hardware products using snap-fits Every fastener in your assembly has a cost. Not just the cost of the screw itself, though that adds up at volume, but the cost of the driver tool, the assembly time per unit, the torque specification and quality check, the potential for cross-threading or over-torquing, and the service time when a field technician needs to open the device. This is why the decision between snap fit design vs screws has a direct impact on overall manufacturing efficiency and cost. Snap-fit joints, when designed correctly, eliminate most of these costs. A well-designed cantilever snap-fit can be engaged in a fraction of a second with no tools, no fasteners, and no torque variability. At a production volume of one million units, reducing assembly time by thirty seconds per unit translates directly into thousands of dollars in labor savings making it a key strategy in IoT enclosure design for manufacturing. The trade-off is engineering complexity and material discipline. Snap-fits require careful geometry to achieve the right deflection force without fracturing the feature. They require consistent material properties, particularly

7 DFM Engineering Techniques to Reduce IoT Enclosure Manufacturing Costs Before Production Read More »

8 Smart Ways to Build a Cost-Effective Hardware MVP Without Over-Engineering

Building a hardware MVP is exciting — until the invoices start arriving. If you’re wondering how to build a cost-effective hardware MVP, the single biggest mistake hardware founders make? Treating the MVP like the final product. This leads to over-engineering, feature bloat, and budgets that spiral out of control before you’ve even validated your first assumption. If you need expert guidance, explore our mechanical product engineering services for startups in the US and Europe for professional support. This guide breaks down 8 proven ways to cut costs, move fast, and build only what matters. 01  Start with a Low-Fidelity Concept — Don’t Jump to CAD Before you open any design software, spend time with pen and paper. Sketching forces you to think through your idea at a structural level without getting lost in technical details that don’t matter yet, making it one of the most effective low-cost hardware product development strategies.. Paper sketches eliminate costly back-and-forth in early design reviews, while foam models and cardboard mockups expose spatial and ergonomic issues immediately. Low-fidelity concepts take hours to iterate — CAD rework takes days and dollars. Stakeholder feedback is also faster and more honest when there’s no polished render to distract. 02  Build a Functional Mockup Before Engineering for a Cost-Effective Hardware MVP A functional mockup doesn’t need to look good — it needs to reveal problems. Physical mockups expose issues that even the best digital design tools miss entirely. Use cardboard, foam, or rough 3D-printed shells to test form and fit, validate spatial proportions, and observe how users actually holds, press, and carry the product. Sharing these early mockups with potential users before any engineering investment gives you real feedback when changes are still cheap and fast, helping reduce hardware prototyping costs for startups and supporting a cost-effective hardware MVP. 03  Focus Only on “Must-Have” Features — Avoid Scope Creep Scope creep is the silent budget killer in hardware MVPs. Every feature you add doesn’t just cost design time — it multiplies across prototyping, testing, sourcing, and production, often driving costs up by 2–3×. To avoid over-engineering in hardware product design, For every feature on your list, ask: “Will the product fail to validate without this?” If the answer is no, remove it from the MVP scope entirely. Fancy displays, premium finishes, and advanced mounting systems can all wait. Prioritise only the features that directly test your core value proposition — nothing else. Case Study Box CASE STUDY 1 — Feature Creep US-Based Smart Home Startup Cut MVP Cost by 42% THE PROBLEM A California-based IoT startup was building a smart home sensor loaded with a touch display, LED indicators, a multi-layer enclosure, and an advanced mounting system. Their MVP cost estimate came in at $38,000+ — primarily because they were designing a final product rather than a minimum viable prototype. WHAT WE CHANGED The team removed the display entirely and replaced it with a mobile app interface, simplified the enclosure to a 2-part snap-fit design, and eliminated every non-critical feature from the build list. RESULT MVP cost dropped from $38,000 to $22,000 — a 42% savings. The team moved 3 weeks faster through the prototyping cycle and secured early pilot customers ahead of schedule, clearly demonstrating how to reduce hardware prototyping costs for startups. Key Insight: Features don’t validate products. Use-cases do. 04.  Choose the Right Prototyping Method Early for a Cost-Effective Hardware MVP Using the wrong prototyping method at the wrong stage is one of the most common budget mistakes in hardware development. Choosing the best prototyping methods for hardware MVP is critical – 3D printing is fast and low-cost, making it ideal for early iterations and form validation. CNC machining is precise and functional, best suited for later-stage validation once your geometry is near-final. Laser cutting works well for flat components and enclosures at a low cost. Injection moulding should be reserved entirely for production — never used at the MVP stage. 05  Design with Manufacturing in Mind (DFM Early) Design for Manufacturability in early stage hardware isn’t something you think about after the design is done — it’s something you bake in from day one. Late-stage DFM fixes are expensive, slow, and demoralising. Align wall thickness to your target manufacturing process from the start, add draft angles to injection-moulded parts during initial design rather than after the fact, and use ribs and gussets instead of thick walls for a stronger and cheaper result. Considering production volume early when choosing materials and processes can save enormous rework costs down the line. Case Study Box CASE STUDY 2 – DFM Early Germany-Based Industrial IoT Startup Avoided €25K Redesign THE PROBLEM An industrial IoT company designed an enclosure with walls over 4mm thick, no draft angles, and complex internal mounts. The prototype worked fine in isolation — but when they moved to manufacturing, it failed completely. DFM had been ignored during the entire MVP stage. WHAT WE CHANGED The team optimised wall thickness to a uniform 2mm, added proper draft angles throughout the design, and rebuilt the internal structure using ribs rather than solid walls — all changes that should have been made from day one. RESULT They avoided tooling rework worth €25,000+ and reduced their per-unit manufacturing cost by 28%. The transition to injection molding then proceeded smoothly and on schedule. Key Insight: If DFM is ignored early, you pay for it later — expensively. Not sure if your MVP is over-engineered? Get an expert design review before you move to prototyping — avoid costly mistakes early. Get a Free MVP Review → 06.  Prototype in Iterations — Don’t Aim for Perfect The most expensive prototype is the one you tried to make perfect on the first attempt. Rapid iteration is how real hardware products get built — learn, improve, repeat. Build the simplest version possible and test it immediately. Each round of testing gives you actionable, real-world feedback that you can incorporate before the next build which is essential for achieving a cost-effective hardware MVP. Multiple

8 Smart Ways to Build a Cost-Effective Hardware MVP Without Over-Engineering Read More »